blackberry-blueberry crumb pie
I am completely and utterly failing at having a low-key, lazy summer. In part because, wait, didn’t summer just begin (NYC schools go to essentially the last day of June) and more largely because I seem to be jumping from big project to big project, we’re suddenly approaching the midpoint of August and I’m faintly panicked that this summer will be over before I have taken in sufficient levels of sun, sand, toasted marshmallows, vacation, and hot, sticky laziness that veers into boredom to fortify us for a big exciting fall and an always-too-long and always-too-cold winter. The fix begins now.
First up: pie. Look, I too enjoy the look of a stunning, woven lattice of a pie lid. Chevron, braided, plaid and twisted ribbon spirals too. I am not immune to the charms of elaborate pate brisee crafts. But I would like to postulate that were we all to eat pie in the dark, only a tiny fraction of those of us who respond to butterfly-leafed lids with heart-eyes emojis (that is, me, me, me) would choose the taste over that of a fluffy, rubbly, cobblestoned crumb lid.
What I’m saying is: Team Streusel. At least in the dark.
A friend of mine is obsessed with the “black and blue” pie at Fairview Farms in Bridgehampton, Long Island. The owner’s daughter, Meredith, makes them and many other flavors with a cult following. We stayed not far from there two summers ago (when this human was but 7 weeks old) and she brought one back warm and I said (wait for it) “No thank you” because my experience with pies is that none, even the best of the best, are better than homemade. Then I spied the crumb topping and I’m 100% sure that I ate pie for both breakfast and lunch that day. I finally got to trying my own hand at it this summer, with the fluffiest crumb topping yet (the secret: baking powder), one that’s basically shortbread rubble, and if you, too, have been concerned that you’re not “summer-ing” hard enough right now, I promise you that nothing will set you back on the right course more deliciously.
Blackberry-Blueberry Crumb Pie
A couple of notes: I have been using tapioca flour/starch to thicken pies this summer. (I buy it from Bob’s.) I like it because it thickens in a clear, unchalky way. But, lots of other things work. I find this chart from King Arthur useful. For this pie, I’d average the amounts for blueberries (which need less thickener) and blackberries (which need more).
Also, this probably goes without saying, but this recipe definitely works with other berries and fruits.
- 1 1/4 cups (155 grams) all-purpose flour
- 1 1/2 teaspoons (6 grams) granulated sugar
- 1/2 teaspoon (3 grams) fine sea or table salt
- 1/2 cup (4 ounces or 115 grams) cold unsalted butter, cut into chunks
- 1/4 cup (60 ml) very cold water
- 4 cups (about 2 pints or 680 grams) blueberries
- 2 cups (about 1 12-ounce/340-grams package) blackberries
- 3/4 cup (150 grams) granulated sugar (for a moderately, but not very, sweet pie)
- Juice of half a lemon
- 7 tablespoons (55 grams) tapioca flour (starch) or 5 1/2 tablespoons (45 grams) cornstarch (see Note)
- Pinch of salt
- 1/2 cup (4 ounces or 115 grams) unsalted butter, melted
- 6 tablespoons (75 grams) granulated sugar
- Finely grated zest of half a lemon (optional)
- 1 teaspoon baking powder
- 1 1/3 cups (175 grams) all-purpose flour
- Two pinches of salt
Crust
Filling
Crumbs
Make pie dough:
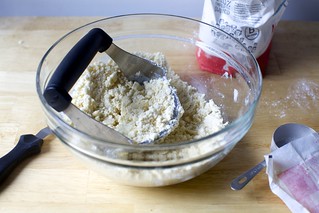
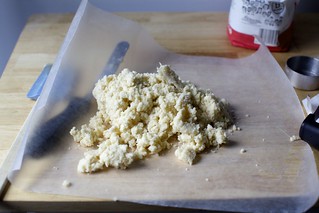
– By hand : In the bottom of a large bowl, combine the flour, salt and sugar. Work the butter into the flour with your fingertips or a pastry blender until mixture resembles a coarse meal and the largest bits of butter are the size of tiny peas. (Some people like to do this by freezing the stick of butter and coarsely grating it into the flour, but I haven’t found the results as flaky.) Add 1/4 cup cold water and stir with a spoon or flexible silicone spatula until large clumps form. Use your hands to knead the dough together, right in the bottom of the bowl. If necessary to bring the dough together, you can add another tablespoon of water.
– With a food processor: In the work bowl of a food processor, combine flour, salt and sugar. Add butter and pulse machine until mixture resembles a coarse meal and the largest bits of butter are the size of tiny peas. Turn mixture out into mixing bowl. Add 1/4 cup cold water and stir with a spoon or flexible silicone spatula until large clumps form. Use your hands to knead the dough together, right in the bottom of the bowl. If necessary to bring the dough together, you can add the last tablespoon of water.
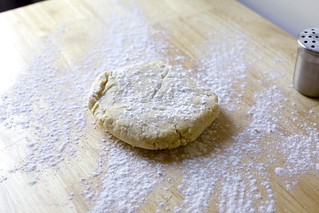
– Both methods: Wrap dough in a sheet of plastic wrap and refrigerate for at least one hour, or up to 48 hours, or you can quick-firm this in the freezer for 15 to 20 minutes. Longer than 2 days, it’s best to freeze it until needed.
Heat oven: To 400°F (205°C).
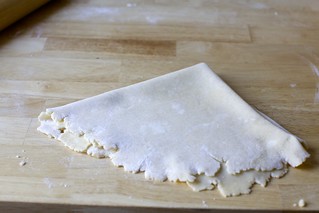
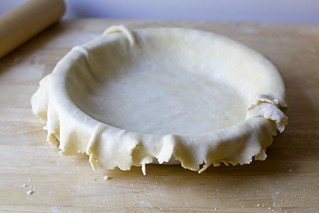
Roll out crust: On a floured counter, roll the dough out into a 12 to 13-inch circle-ish shape. Fold dough gently in quarters without creasing and transfer to a 9 1/2-inch standard (not deep-dish) pie plate. Unfold dough and trim overhang to about 1/2-inch. Fold overhang under edge of pie crust and crimp decoratively. Save scraps in fridge, just in case.
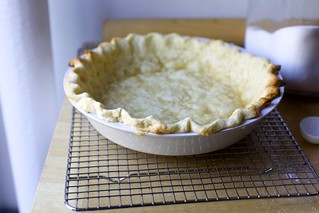
Par-bake crust: Freeze for 15 minutes, until solid. Dock all over with a fork. Coat a piece of foil with butter or nonstick spray and press tightly against frozen pie shell, covering the dough and rim and molding it to fit the shape of the edges. Bake for 20 minutes, then carefully, gently remove foil. (Set the foil, still molded, aside. It will come in handy later.) If any parts have puffed, just press them gently back into place. Patch any tears or cracks with reserved dough scraps. Reduce oven temperature to 375°F and leave oven on.
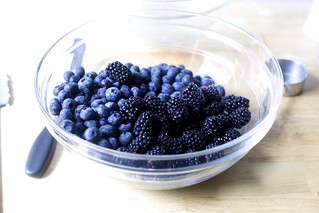
Meanwhile, make filling: Mix all filling ingredients in a large bowl and set aside.
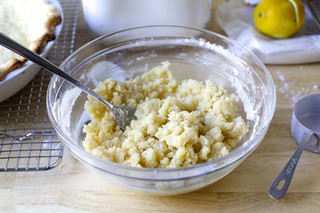
To make crumb topping, stir sugar, zest, baking powder, flour and salt into melted butter in a large bowl with a fork until crumbs form.
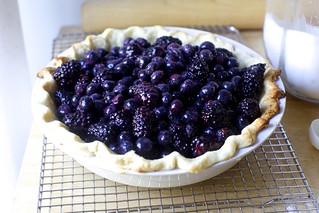
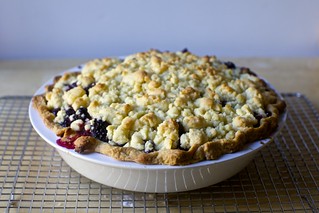
Assemble and bake: Pour filling into crust and scatter crumbs over the top. Bake for 50 to 60 minutes with these two important things in mind:
1. This crumb browns much more quickly than the pie is done. Grab that piece of foil you set aside from the parbaking phase and upend it over the top of the pie to protect it against further browning once it reaches the color you want. This might only take 20 to 30 minutes.
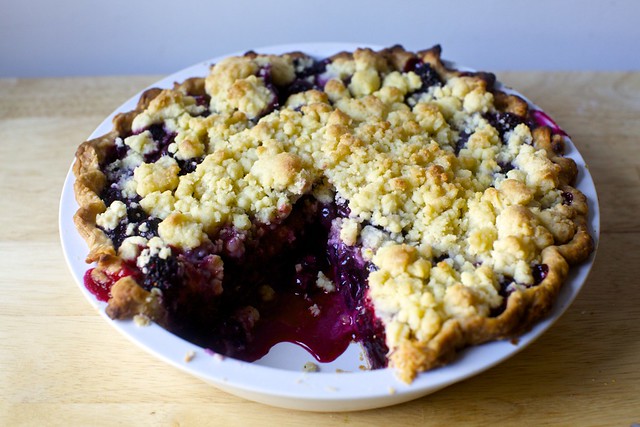
2. Fruit pies are done when you can see bubbles forming at the edges, with some creeping through and over some crumbs. If it takes longer, that’s better than an underbaked pie.
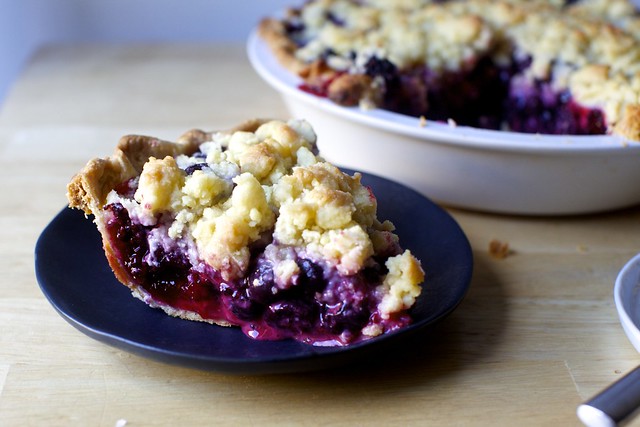
To serve: Try to let the pie cool until close to room temperature before serving. This gives the pie thickener a chance to help the pie set. The pie will be even better set after a night in the fridge. Bring it back to room temperature before serving.
Share this:
Related
ncG1vNJzZmirnZ7BtbHNpKCtm5iau2%2BvzqZma2hhbHxxhI6bo5qbm5eys77YZpmlrZWXsrO%2B2Gaaq62dl3qxtcRo
